Plesk Onyx is the most used ASP.NET web hosting control panel and in this tutorial will discuss how to upload your website using it.
Basically there are 2 options, the first one is to use FTP and the second one is to use File Manager.
Upload your website using FTP
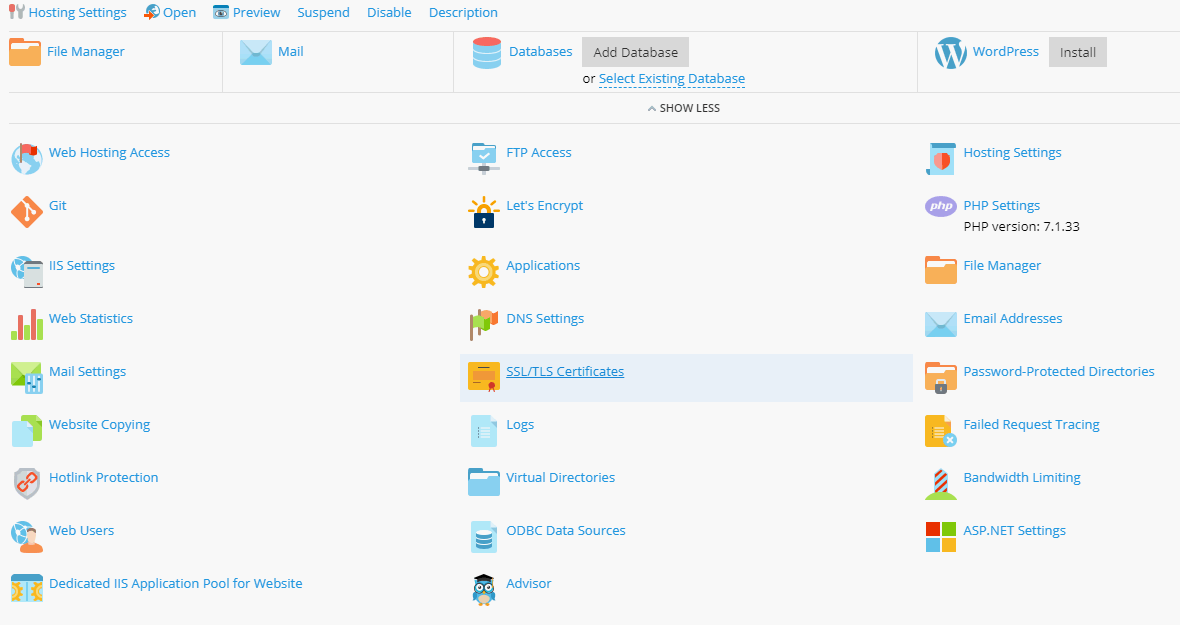
 1. Login into your Plesk control panel
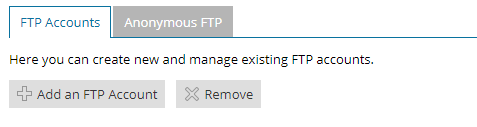
2. Click on FTP Access
3. Click Add an FTP Account (If you are working on your website together with someone else or host subdomains for other users, you might want to create separate FTP accounts for them.)
4. You should enter the following information:
– FTP account name
– Home directory
– New password
– Hard disk quota
– Read permission
– Write permission
5. After creating an account install your favorite FTP client, for example FileZilla
6. Run FileZilla and enter your Host, Username, Password and Port and that is, you could connect to your server and upload your website.
1. Login into your Plesk control panel
2. Click on FTP Access
3. Click Add an FTP Account (If you are working on your website together with someone else or host subdomains for other users, you might want to create separate FTP accounts for them.)
4. You should enter the following information:
– FTP account name
– Home directory
– New password
– Hard disk quota
– Read permission
– Write permission
5. After creating an account install your favorite FTP client, for example FileZilla
6. Run FileZilla and enter your Host, Username, Password and Port and that is, you could connect to your server and upload your website.
Most of the reliable ASP.NET hosting providers will require to use SFTP (Secure File Transfer Protocol) which is the same as FTP but uses secure connection.
Upload your website using File Manager
 1. Login into Plesk control panel
2. Click on File Manager
3. Click Upload from the upper menu
4. Select your files and upload them on the server
1. Login into Plesk control panel
2. Click on File Manager
3. Click Upload from the upper menu
4. Select your files and upload them on the server
Conclusion: The FTP upload is faster and is more used of the two, but if you have not FTP client and would like to upload a few files or images then the File Manager is a good option too.